
Since we moved in, we’ve been debating the best options to maximize our dining space. It’s rather small, and our dining set from the apartment fit (miraculously) but only accommodated four people.
We looked at a few dining plans online, but none quite suited our space, desired style and budget. Loving the rustic look of a farmhouse style bed and breakfast and we had visited recently, Bobby and I decided to wing it. Here follows our first adventure in true furniture building with a farmhouse table and benches!
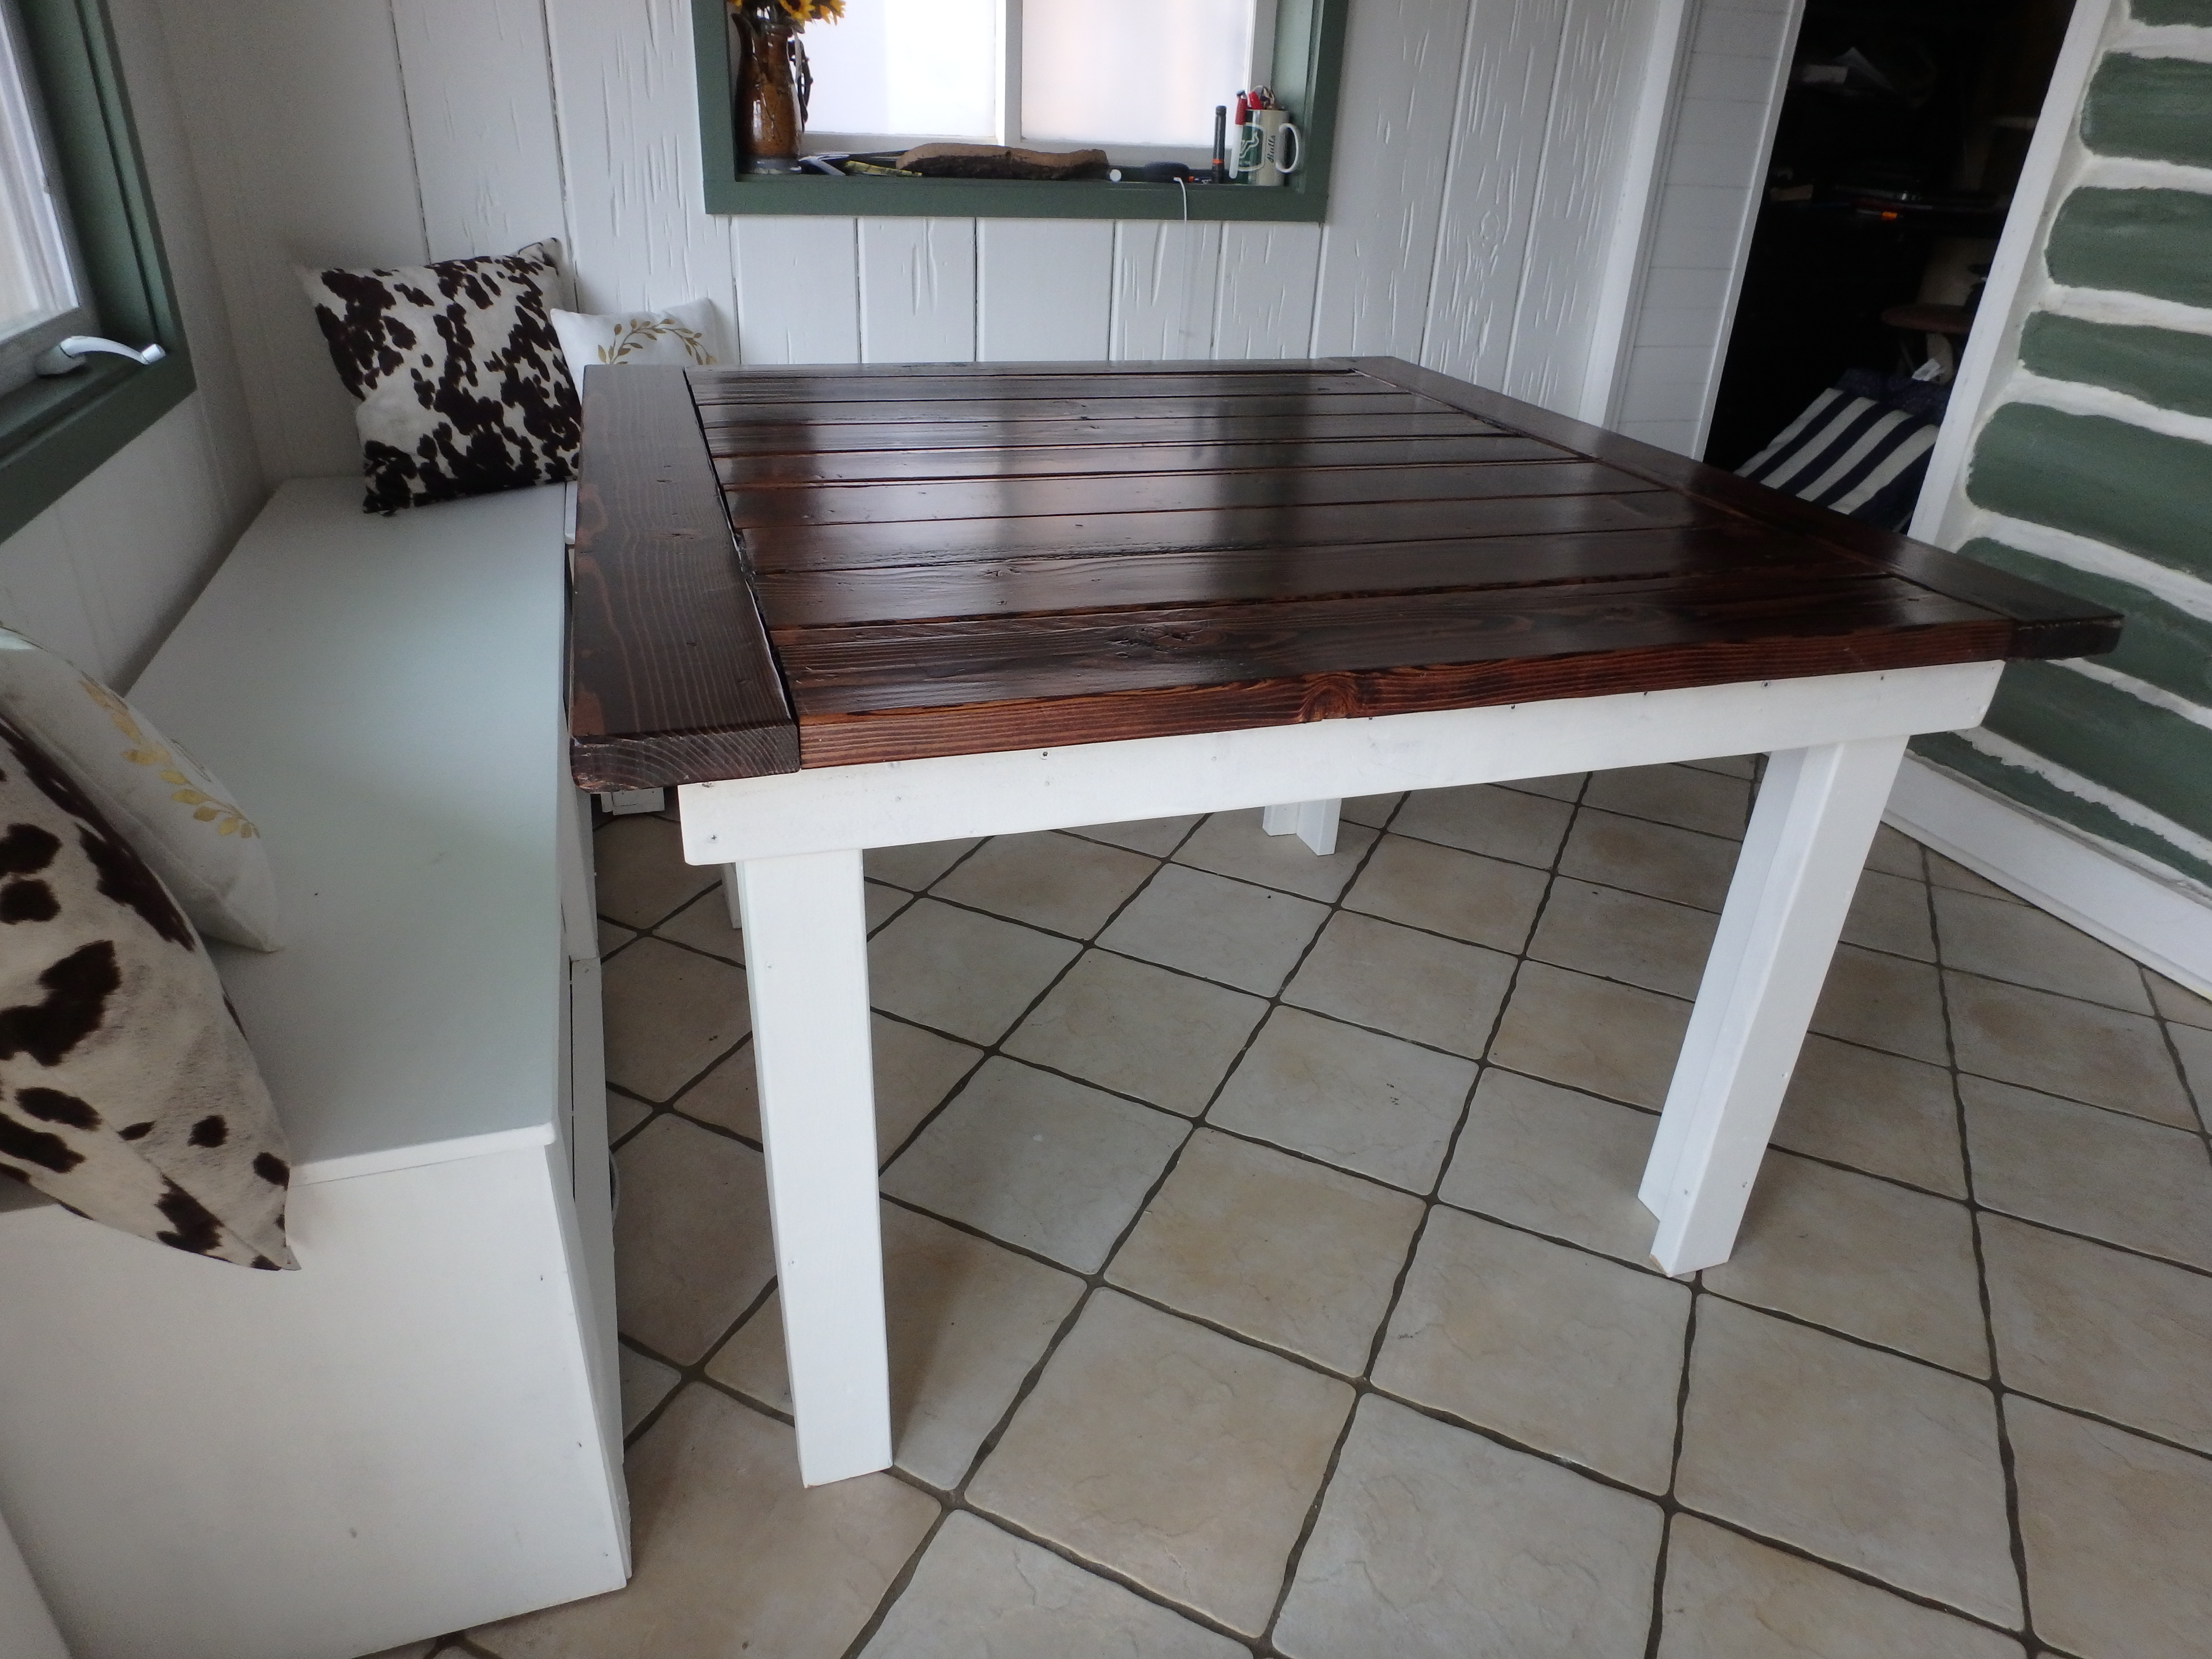
Dimensions Table 53”x51”, 33” tall
Supplies
Miniwax Pre-stain Wood Conditioner
Miniwax Woodfinish Penetrating Stain- Red Mahogany
Miniwax Helsman Clear Semi-Gloss Urethane
White Paint
Hand Sander with 240 grit and 80 grit paper
Plenty of nails and screws
Tack Cloth
4 hinges
Table Lumber:
12 2x4s
11 2x6s
8 2x3s
2 2x2s
2 1x2s
Bench Lumber:
¾ inch 4×8 birch plywood
½ inch 4×8 birch plywood
10 2x4s
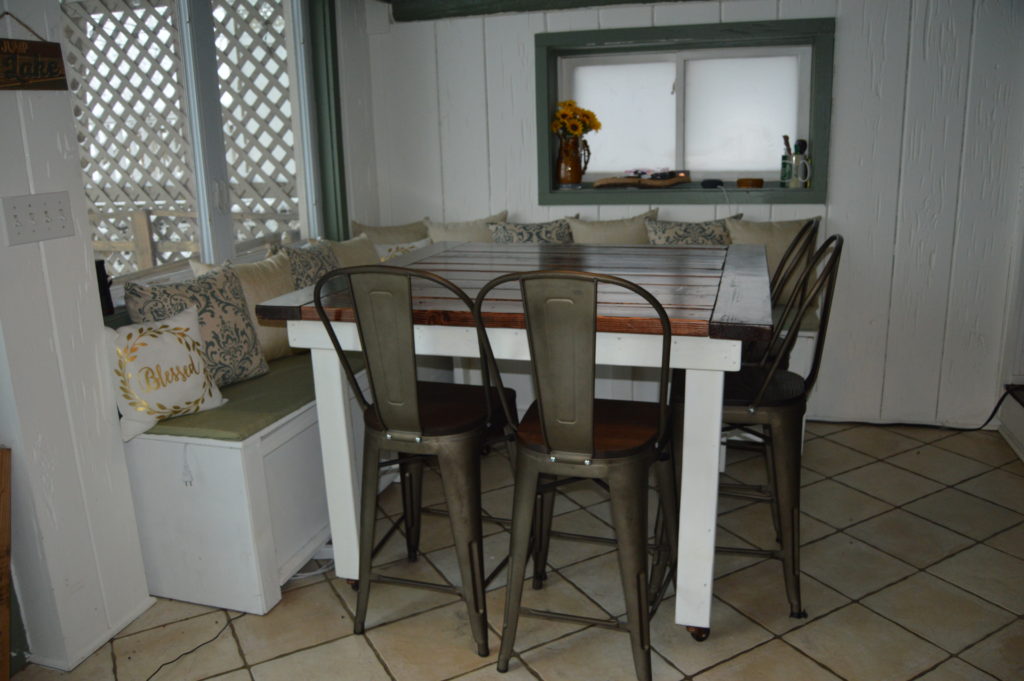
Each bench has three frames measuring 21” high x 19” wide. The 1/2inch plywood was inserted behind or inside for the sides and floor, with the ¾ inch plywood making the seats. We framed both benches with 2x4s in the front. I applied two coats of white paint, after I decided against staining the seat tops, as we are making cushions to cover them. However, if you are not using cushions, I highly recommend the stain over a painted top- it will better hide the wear and tear of daily use.
The table uses 6 2x4s for the legs and another 4 as the frame.


After sanding the table, thoroughly vacuuming it and then wiping with a tack cloth, I applied wood conditioner to the top and let it dry overnight. I then applied one heavy coat of stain. I used a synthetic brush, despite the recommendations for a natural bristle brush, and wiped off the excess stain with a rag. I was counting on a 2nd coat of stain to achieve the desired color, but one was actually perfect.
The stain wasn’t fully dry after 24 hours, thanks to the chilly temperatures in our garage. So, I waited another 24 hours before applying the first coat of urethane. Next day, I sanded it with 240 grit paper, and wiped it clean several times with a tack cloth to remove all the dust and particles before applying a second coat or urethane. You can sand and add a third coat for extra protection, but I figured two was enough, plus I was just ready to be finished!
Lastly, we painted the table legs white to match the benches.


We ordered the chairs from Amazon, which measure 24 ¼ seat height. They are the highback ‘Rusty’ wood style. In addition, we added 2” casters to the bottom of the legs. The extra height made the chairs a better fit, and also allow us to roll the table away when we need full access to the storage benches. They are non-locking casters, but the weight of the table is enough to keep them steady.
The cushion fabric came from Calico Fabrics. It was a discontinued clearance upholstery fabric, a great find, with just enough material to make our cushions. I recommend checking an upholstery fabric store, rather than a typical crafts store, which will have a limited selection. If you make your own cushions, be sure to choose either upholstery or indoor/outdoor fabric, so they stand up to the wear and tear. I ordered the 1″ thick cushion foam from Amazon-it was the best price I could find. The various pillows came from Hobby Lobby.
The table, benches and chairs comfortably seat 8 people, but can push up to 10 if the bench folks squeeze in. Both benches open for ample storage space which was a huge bonus in our small house.
Completed Dining Set
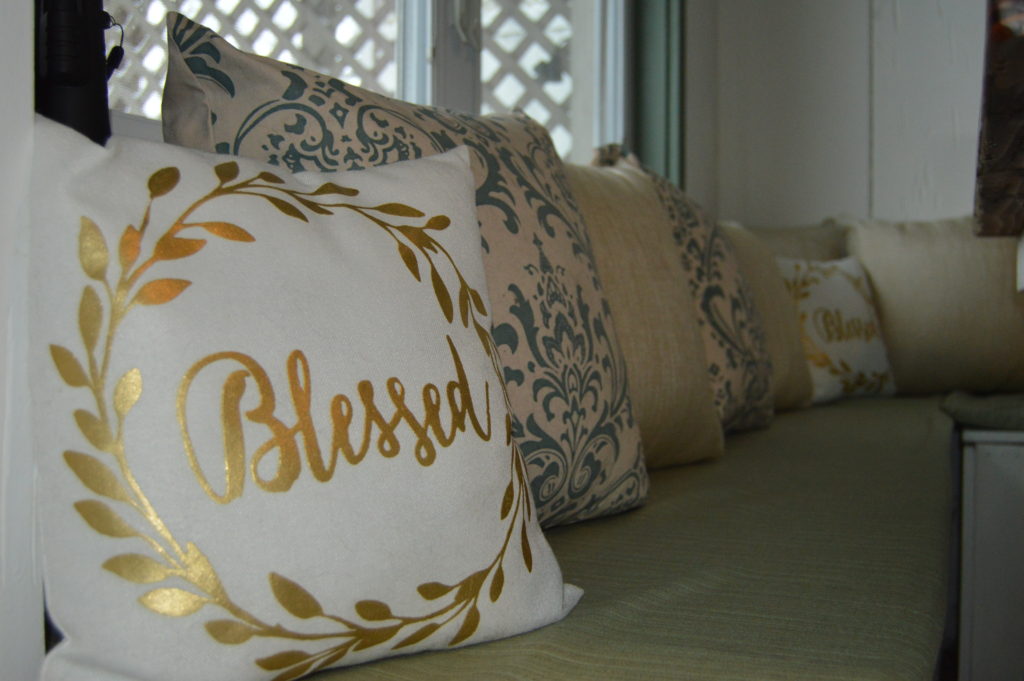
Pillows and Cushions
One year update: The table top is perfect- the stain and urethane coat have handled things beautifully and still look like new.
The cushions have also held up perfectly, with some minor spot cleaning thanks to kitty messes.
I advise using a) higher quality, smoother wood on the ends of the benches, and b) using a non-matte finish paint. The wood is not rough by any means, but it’s not perfectly smooth either. Cat hair clings to it like non-other. Being the end, outward facing pieces of the benches, they are the most visible and receive the brunt of daily action. Matte finish is the least durable and cleanable paint finish, I learned the hard way, while high gloss is the best for the busiest areas. It holds up, being easier to clean. Avoid my mistake and use satin, semi or high gloss paint!